Feb 20, 2009

NEW GIFT WRAP


I was tickled today when I received a lovely batch of new CR Gibson catalogs hot off the press. Right on the cover the fabulous CR Gibson team featured two of my wraps.... and they look so good. I want to share more images with you but for the time being here's the front cover! The top box is in BEATRICE, a favorite of mine.... and then there's the bottom box clad in ENCHANTED GARDEN. I promise to load more images as I get them.... the baby wraps are delightful! Susie I adore working with you!
Tinks
See more of the collection at crgibson.com

Feb 7, 2009

Cookie Coat Sewing Pattern TUTORIAL

This is a tutorial to be used in conjunction with the COOKIE COAT sewing pattern. The coat is a gloriously wide coat with 3/4 sleeves... the pattern includes 3 sizes, small, medium and large, for a toddler aged 2-3 to a 6/7 year old.
Sizing for this coat:
Small 2T/3T: length from shoulder: 22"
Width at waist: 21"
Sleeve length: 12"
Medium: 4T/5T: length: 23"; width: 24.5", sleeve: 14"
Large: 6/7: length: 25", width 26" and sleeve: 15"
I recently made the Cookie Coat for my Amelia... who is 6. She's a petite 6 with long legs... Anyhoo, we selected 2 fabrics from one of my recent collections, FAIRY TIP-TOES, Cupcake Medley in Blue and Pink Silhouette Polka for the lining, neck and sleeves....

So, the first step for this is to prepare the fabric and pattern. I designed the bodice for the coat to be cut all in one piece. A little unconventional but a method which is quite efficient. Simply fold your fabric in half lengthwise (as it comes off the roll), and fold again along it's first fold. Lay the bodice pattern with the neck at the folded point, sleeves facing toward the selvedge edges. Pin so the center of the bodice lays down the double fold, and the sleeve top lays across the short fold. Cut through all 4 layers. Then first cut the back neck shape through all layers, and then just the front layer you're going to cut the deeper neck line which would be the front of the coat bodice.
Next carefully cut through the front fold and only the front fold as in the image, to form the front openings of the coat.
---
Next is the skirt part of the coat.
The pattern piece is used to cut both the front and the back. First lay the piece along one fold of the fabric, and cut out the skirt as the pattern indicates, then using the same piece repeat for a second piece. Once cut out, again cut through the fold of just one of the pieces - to form the front openings of the coat.
--
Then cut the bands, and strips for the remaining bits and pieces for the coat as indicated on the pattern pieces.
--
Now repeat for the lining fabric - both bodice and skirt are cut the same way as above.
NOTE: If you use a fabric like I did here, with a directional pattern, when you fold the fabric the second time to cut the bodice out in one piece, the birds will be upside down on the backside. So, what I did here was to cut the front and back separately with a 1/4" seam allowance along the shoulder top. Once cut out, I simply seamed the shoulders to form one piece.
---
SEWING
The bodice calls for two coordinating strips topstitched onto the bodice piece. The image shows placement of these strips.
The next item is the pleated strip along the back waist band of the coat. I love this because it ads such flavor to the coat. Pleat the band so it measures 21" or sits inside the edges of the sides of the coat.

Next is the skirt. On the pattern I show pleat marks where to pleat so as to fit along the bodice edge. Use your judgement here, I created a deep pleat center back, which was enough to fit the bodice edge.


The next images simply illustrate sewing the lining coat to the exterior coat along the front yoke strips; adding the frilly collar, and binding to finish the raw seam allowance.
And finally an image of my Amelia in her finished coat.


Jan 15, 2009

FAIRY TIP-TOES


FAIRY TIP-TOES is glorious... I have been working with the collection now for a while.... the large panel is a yard long by 44" wide and it is F. U. N. I designed backing fabrics to match.... never too matchy matchy, the fabrics are a nice compliment to the larger panel. Designing the panels were fine until I realized that all that artwork had to be contained in a maximum # of colors... 16 to be exact... so each unit had to be carefully marked with color chips.... Through the approval process with the mill I questioned my sanity in creating the panels. And if you know textile design, if I didn't like one color in the acquas, if I made that change everything in the panel would change.... yeowsa! But thankfully it worked!
This one I named Meranda.... she's so colorful and pretty. Check out the other two - Ella in soft pinks and Persephone - in violet and soft yellow.
The panels I use in clothing for kids.... use them in dresses - talk about coversation starters! More pics coming.... In my upcoming book I used 'Ella' and created a perfect little top, called 'Annie's Top'... with fun and full frilly sleeves and unexpected collar!
Yummy!
Check out the other panels on tinagivens.com, HERE.

The collection has shipped so check for it. A few online stops:
The Quilted Castle
Hancocks-Paducah
Sew Mama Sew
Sweet Peas and Angels

Georgina and Zazu


Working with my own fabrics is an interesting thing.... We work with one collection at a time (well sometimes two at a time), and right now it's new Treetop and Fairy Tip-Toes. I get so acquainted with the fabrics from inception, through the design process, and onto the arduous production process through revisions and finally months later the finished yardage! Then we get to play, cut and have fun with my new little friends! Or children, which is a little odd, but true!
Well, a funny thing has happened.... I am constantly reminded of my older collections through projects, bolts in the studio and images I have.... but I actually miss working with them..... I spend weeks and weeks with them, and oh well onto the new....
Well I thought I'd share a few of my favorites...... Zazu and Georgina..... I selected the ones I had most fun working with.... Please visit them, and maybe collect them too - visit quilthome.com and see them all waiting to sit on your fabric stash shelf... awaiting a project or two!
Let me know which you choose!
My best this cold wintery day to you and you and you!

Dec 2, 2008

Book in the works!


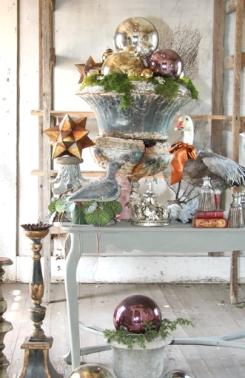
Decorating for the holidays is so much fun! I took myself off to the bookstore today and piled up all the magazines filled with trees and sparkles and fantastic ideas... One of my favorite companies for holiday decoration is Cody Foster & Co. They are perfect with their scope of categories and an amazingly lovely eye for getting it right in an eclectic way! Anyway I thought I'd share!

Other news, I escaped the sewing studio today because I have been a mad woman for a while now designing and creating tiny and sweet items for the book in the works. Some of the items include little squeaker booties and hats for babes, of course the fabulous crib bumpers and they came out fantastic using new fabrics due out in the near year! I created a super-easy scalloped crib skirt I know some of you will love love love, a changing pad cover and several unpredictable projects you will not want to miss for infants' room. OK, then there's the toddler years and the duds I designed for both boys and girls I think you will find irresistible! I had both at the same time, boy and a girl and dressed them uniquely... boys are just as important as girls and these sweet little outfits say it so! I am working on the 4s and 5s who are crazy flexible and require flexible couture no? Finally for the oldest kids, 6/7.... I am working on fantastic projects you will love! I have two this age and they personally approved the project list!

When I get a few pics I'll share, so stay tuned for tiny peeks into the book... still working on that title... 'sewing with Tina' is not cutting it right now! Any ideas? Eclectic, fun, creative, unpredictable, colorful! All for kids... so come on help me out!

If you live in the USA, hope your Thanksgiving Holiday was a treat! I ate much pumpkin pie and whipped cream...

Picture: © Cody Foster & Co.

Nov 24, 2008

Vera Neumann


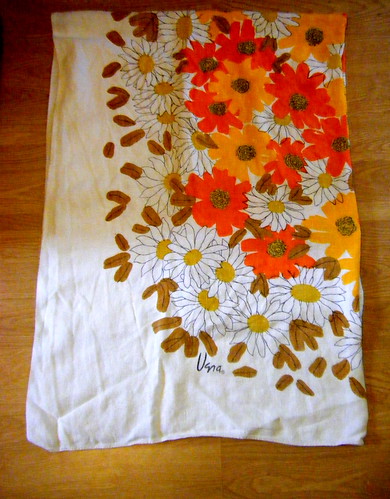
Oh my goodness! I have discovered VERA NEUMANN... Me Oh My! What a clever lady... and I love the story... she was an artist and turned textile designer using post WWII silk parachute to screenprint her designs... Apparently she started this just past the age of 40... I am in love with her free spirited hand... and that color is to die for. Vera designed everything for a 36" square scarf... and adopted the ladybug as her trademark for good luck, long life and happiness. Later in 1950s and a grown staff and facility, her company was releasing as many as 500-600 designs a year... that's a lot! In the 60s a clothing line was added and the fabric was designed with the garment in mind... Finally selling the company but working on as designer, she worked 6 days a week, Tuesday was reserved for her hair appointment and the board meeting in Manhatten (by the way, the board accommodated her schedule). Apparently working until her death in 1993... the old gal was 86 when she went....
I love this story and will find out more about Vera... I must begin a new collection of vintage Vera Napkins.... what do you think?
Best, T

Nov 16, 2008

Bakelite Buttons


Antique Bakelite Buttons PDF Print E-mail


Bakelite Buttons are so gorgeous! I have decided they are my favorite of all the buttons in the world! I am working on my book and as you may or may not know, I love embellishing my stuff with everything from charms and beads to sticks and crystal droplets and of course, buttons and ribbons. And when doing the Quilt Shows I found amazing buttons... and they are not inexpensive, but well worth the find. If I had more time I think I'd make this a serious collection activity... but then again, as I write this I hear my two little ones making their normal busy 'ruccus' upstairs! And I am reminded my time is limited for self-absorbed activities like browsing flea markets and vintage stores... But wow... I do find them on my fabric travels, and this amazing thing called the internet! Whewee.... thank goodness. So here's a few of my favorite sites. and a short blurb about the history of Bakelite!

A history of Bakelite Buttons :

Sites to shop for buttons:
www.antiquebuttoncollecting.com
http://www.wtv-zone.com/julia801/Site/Bakelite.html
www.vintagebuttons.net/ccplastic.html
http://www.tinseltrading.com/catalog/cat-buttons-buttons.php
http://www.primrosedesign.com/buttons.html
http://www.etsy.com/shop.php?user_id=5705479


Nov 9, 2008

Fairy Wings


fairy wings
Originally uploaded by tinagivens
She's such a little fairy... this is my angel and fairy all rolled into one! Wearing a dress called Angel Smock (sewing pattern available). And a sweet little topper! The wings will be discussed and instructed in my new book in the works due out next year!
I am also now officially a 'flickr' participant.... so see more images there!
My best and happy Saturday to you and you and you!
T

Nov 5, 2008

Shoes


Besides handbags, shoes are another fav of mine! I have always been a shoe-lover (who isn't?) So at market I wore these fabulous shoes which actually deserved their own photograph. These literally stole the show... and worked well with the booth! Slingbacks and I am sorry you can't see the adorable little red buckle closure!
Anyway, short and sweet. I got 'em from SoHo Shoes here in Raleigh and I believe they have some in stock so go for it....

I believe the manufacturer is LaLove or something like that - It's a difficult label to read.

--

Nov 3, 2008

Baglady Sewing Pattern - tutorial


One of my recent patterns is this fabulous bag pattern I called BAGLADY! I am very definitely a 'baglady'... love bags, some of my favorite all time bags are from Orla Kiely, Kate Spade and fabulous tote and canvas casuals from Hable Construction.... Anyhoo.... apparently bag patterns are a hot these days.... and I am so very pleased I have this one. I am designing more for you other bag fanatics out there.
The crazy thing is I have been designing and making my own bags (and hats) for a very long time. My very favorite I called a 'YaYa bag' I created out of a deep wine velvet... it truly was a little vintage inspired Granny bag... thus the 'YaYa' label (Greek for Grandmother). I was also into ribbon embroidery at the time so I embellished the opening with loads of narrow silk ribbon 'french-knots'... Oh I am so off on another story here... oh well.

The Baglady Tutorial
To be used along with the hard copy of the sewing pattern BAGLADY by Tina Givens # TG-A5029.

So the 'Baglady' Tutorial.... I love this bag because it's large, casual and fabulous. You need this bag for everyday fun. I mean I am off to the studio with my portable harddrive, camera, various cables, a few files I keep on me including work, but personal files too, kids stuff, etc. The phone of course, the wallet, little makeup pouch for touch ups, a few tissues, business cards, daily mail, oh let's not forget the watercolor tubes, paint brushes, tiny sketchpad, journal and pencils. A pen, check book, miscellaneous items like a few toys, gum, oh my gawsh.... ok you get the picture...
Baglady measures a wopping 18.5 " wide x 13" in height plus another 9" for handles, x 5" deep.
For the tutorial I selected one of the new fabrics from Treetop Fancy collections, actually called TREETOP (TG48) in Pink Papaya.... lined in Gossip Tree TG51 (pink papaya). Now if you don't have the infamous Baglady sewing pattern... purchase it at one of these fine locations: FIND IT HERE! This blog post may make no sense without.

Ok, so let's start. Once all of your pattern pieces are cut out, fuse the pieces as the pattern instructs, then we begin with the handles. They're easy enough. When designing the pattern I made the handles long enough so shoulder carrying can be an option.

Next is top-stitching the side panels for the bag, which I love because not only does it add flavor and secures the fleece (which I can never get to completely adhere - does anyone else have issues with this?), but it also adds a professional touch. We can't look too hand-made right?
Once this is done, we add the handles to the side panels. I do this in two steps. Once pinned in place as the pattern indicates, I sew the handle tops in place at the 2" mark (note pattern); then I pin the handles back upward, pin and again stitch. This all makes for a strong handle. Remember, we carry all but the kitchen sink in there right? So now our handles are in place.

Easy! And on to the zipper panels. The pattern makes it all easy. Just follow those instructions, you will use the technique again and again.
Now the bottom panel. Simply a long rectangular piece, pinned along the bottom edge of one side panel, and upward on each side.
Stitched in place. The image here shows that bottom panel pinned in place. We add the top zipper panel, here. And then topstitch the bottom panel to the top panels on each side, you can see the 3 rows of stitching here.

Then onto the other side of the bag, which is easily sewn onto the combination 'half-a'bag' you just put together. Now, inside out it should look something like this!

From here, we move to the lining, which is done identical to the exterior pieces but for the zipper, the handles and an inside pocket. The pocket is very important for those tiny things and that very vital phone... it should look something like this! My birds I used for the pocket are indeed side-ways but I am really only the one who gets to see it (instead of wasting fabric).
And that's all there is to it. Cutting out the pieces takes about half-an-hour to an hour, depending how many children are talking to you while you are doing it. And the actual sewing to completion takes about 3 hours... that is it. Not bad I'd say. So let me know if this was helpful to you... Get the pattern if you don't have it already, and let me know what you found difficult or easy!

Note: The above tutorial is to be used along with the actual hard copy of the BagLady Sewing Pattern by Tina Givens #TG-A5029 as shown above.